Connect Wallet with aurascan.io #
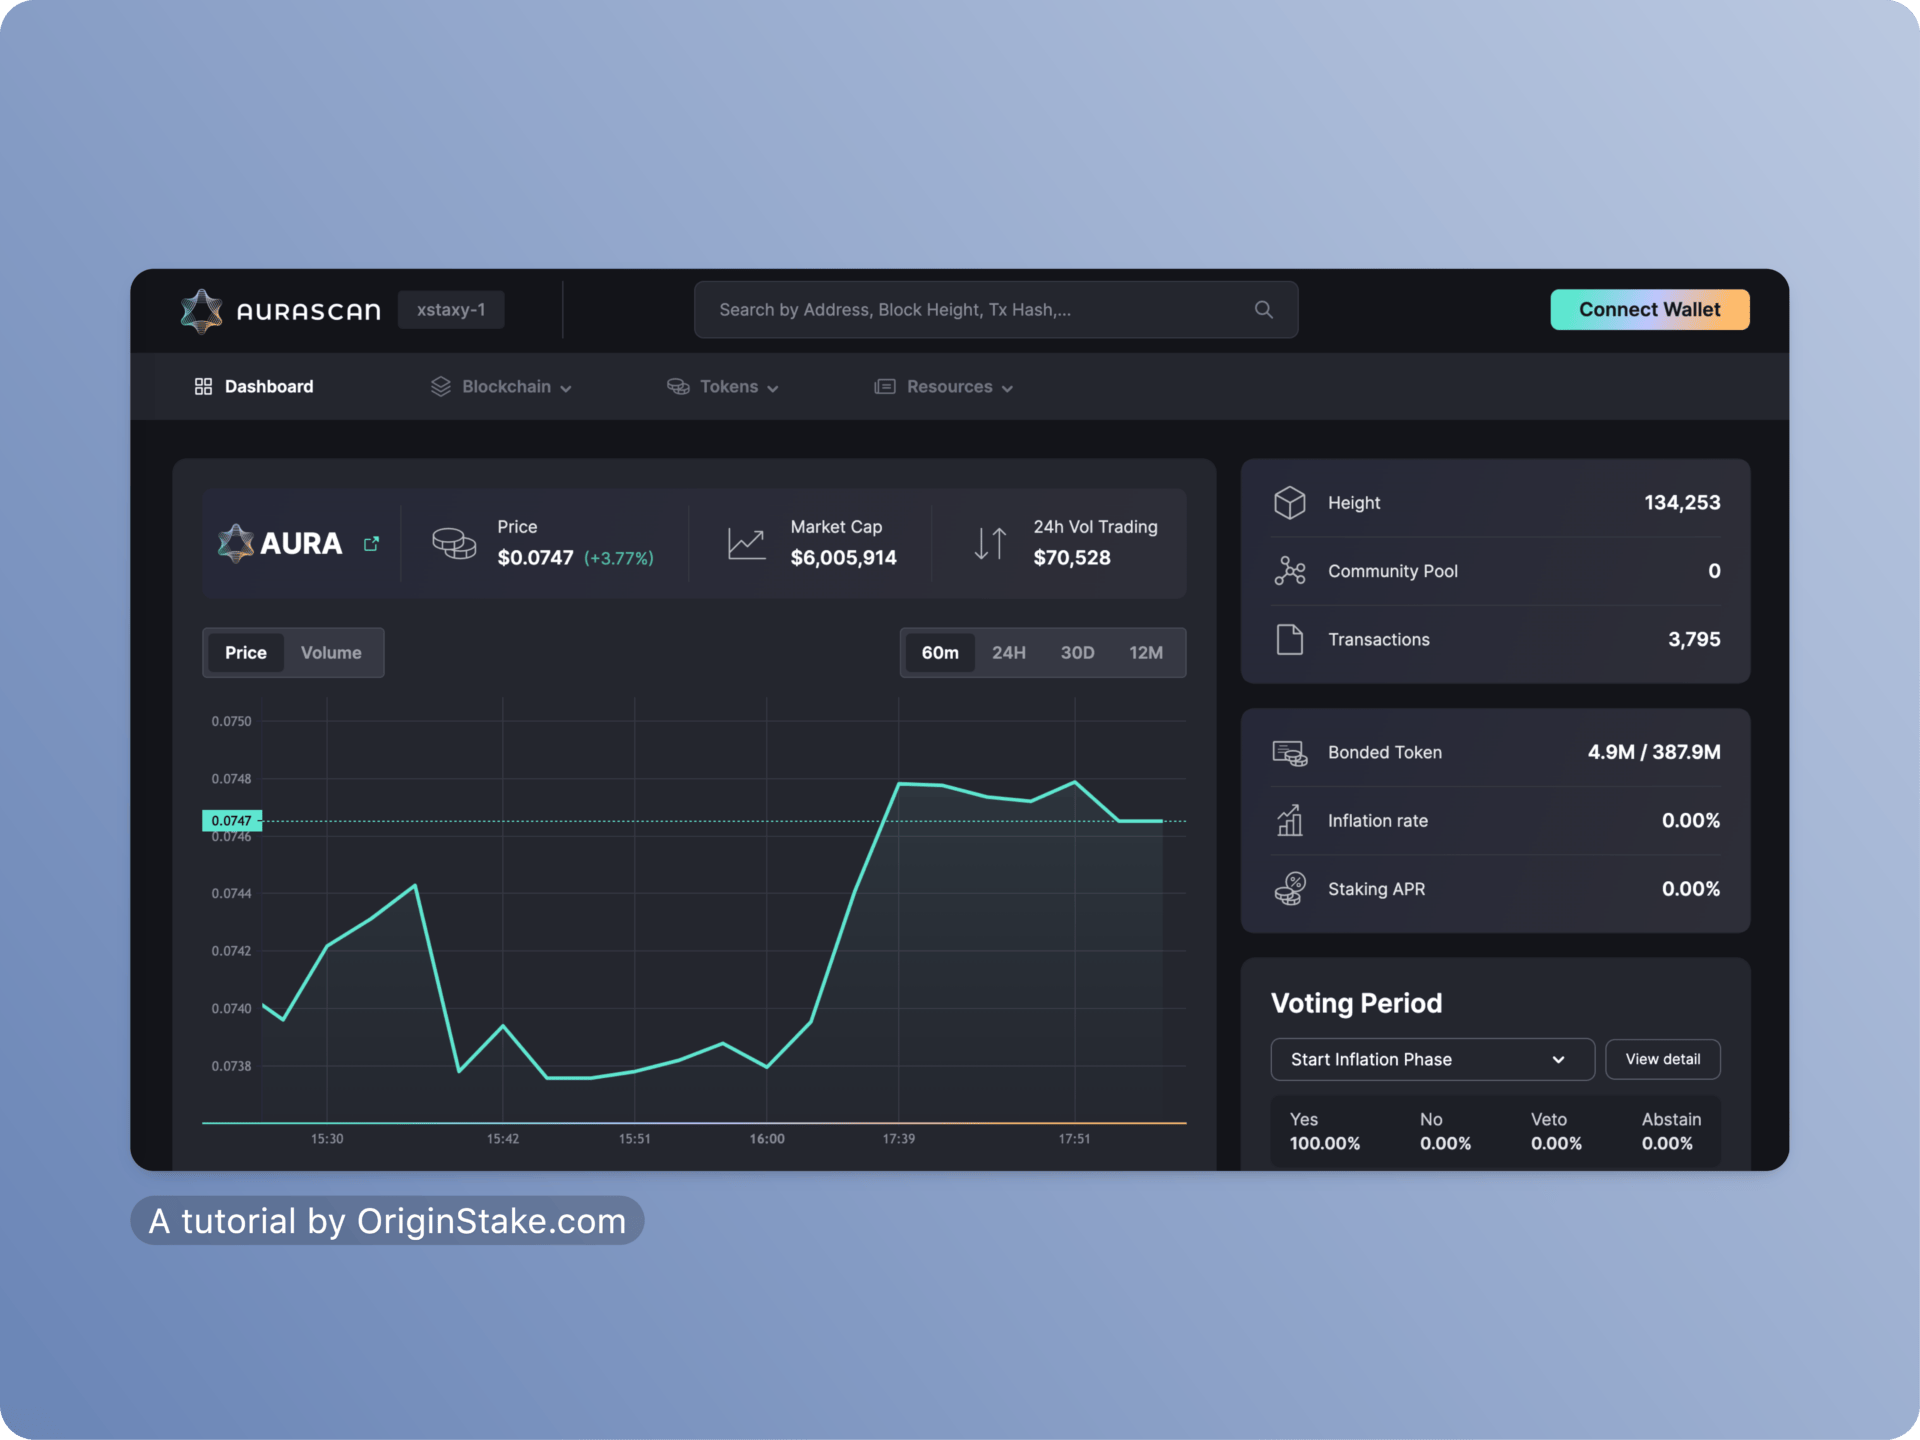
Access aurascan.io and click on “Connect Wallet” to connect your Keplr Wallet.
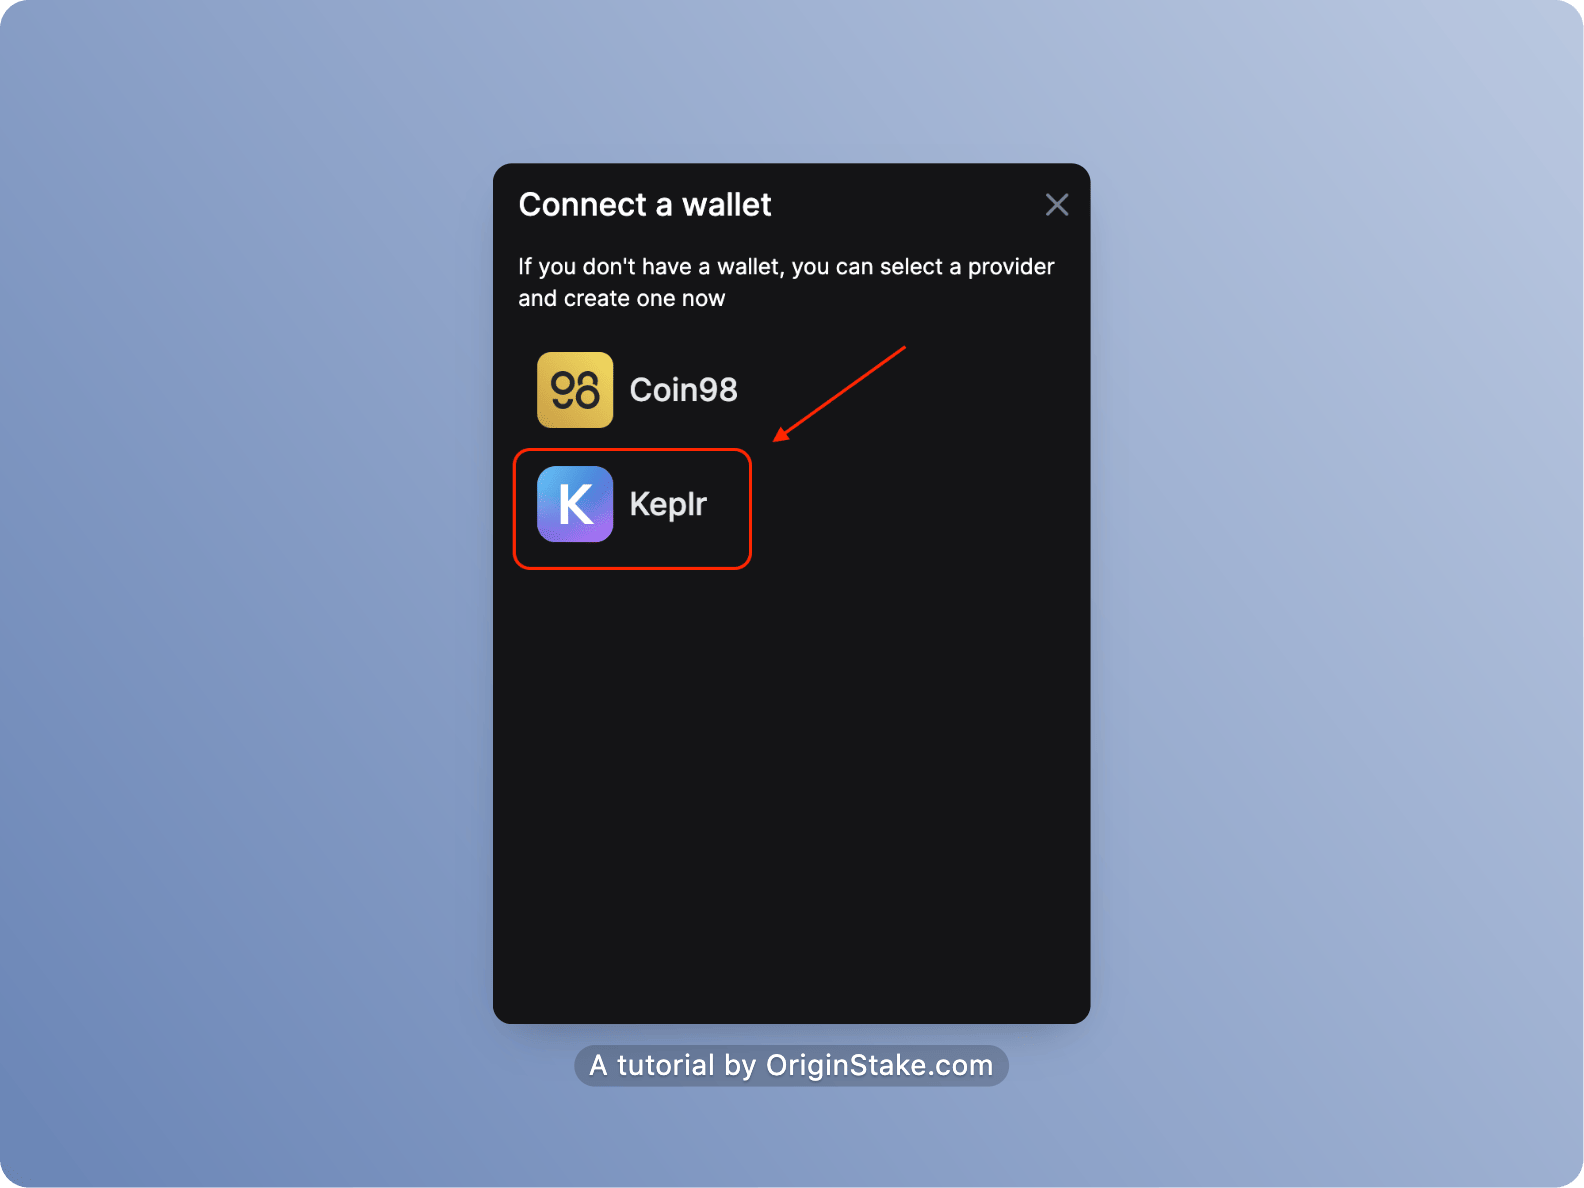
A small pop-up will appear, select the Keplr wallet icon and proceed to connect.
Chose “Approve” to add Aura Mainnet into Keplr Wallet.

Unstake/Undelegate $Aura by using Keplr Wallet
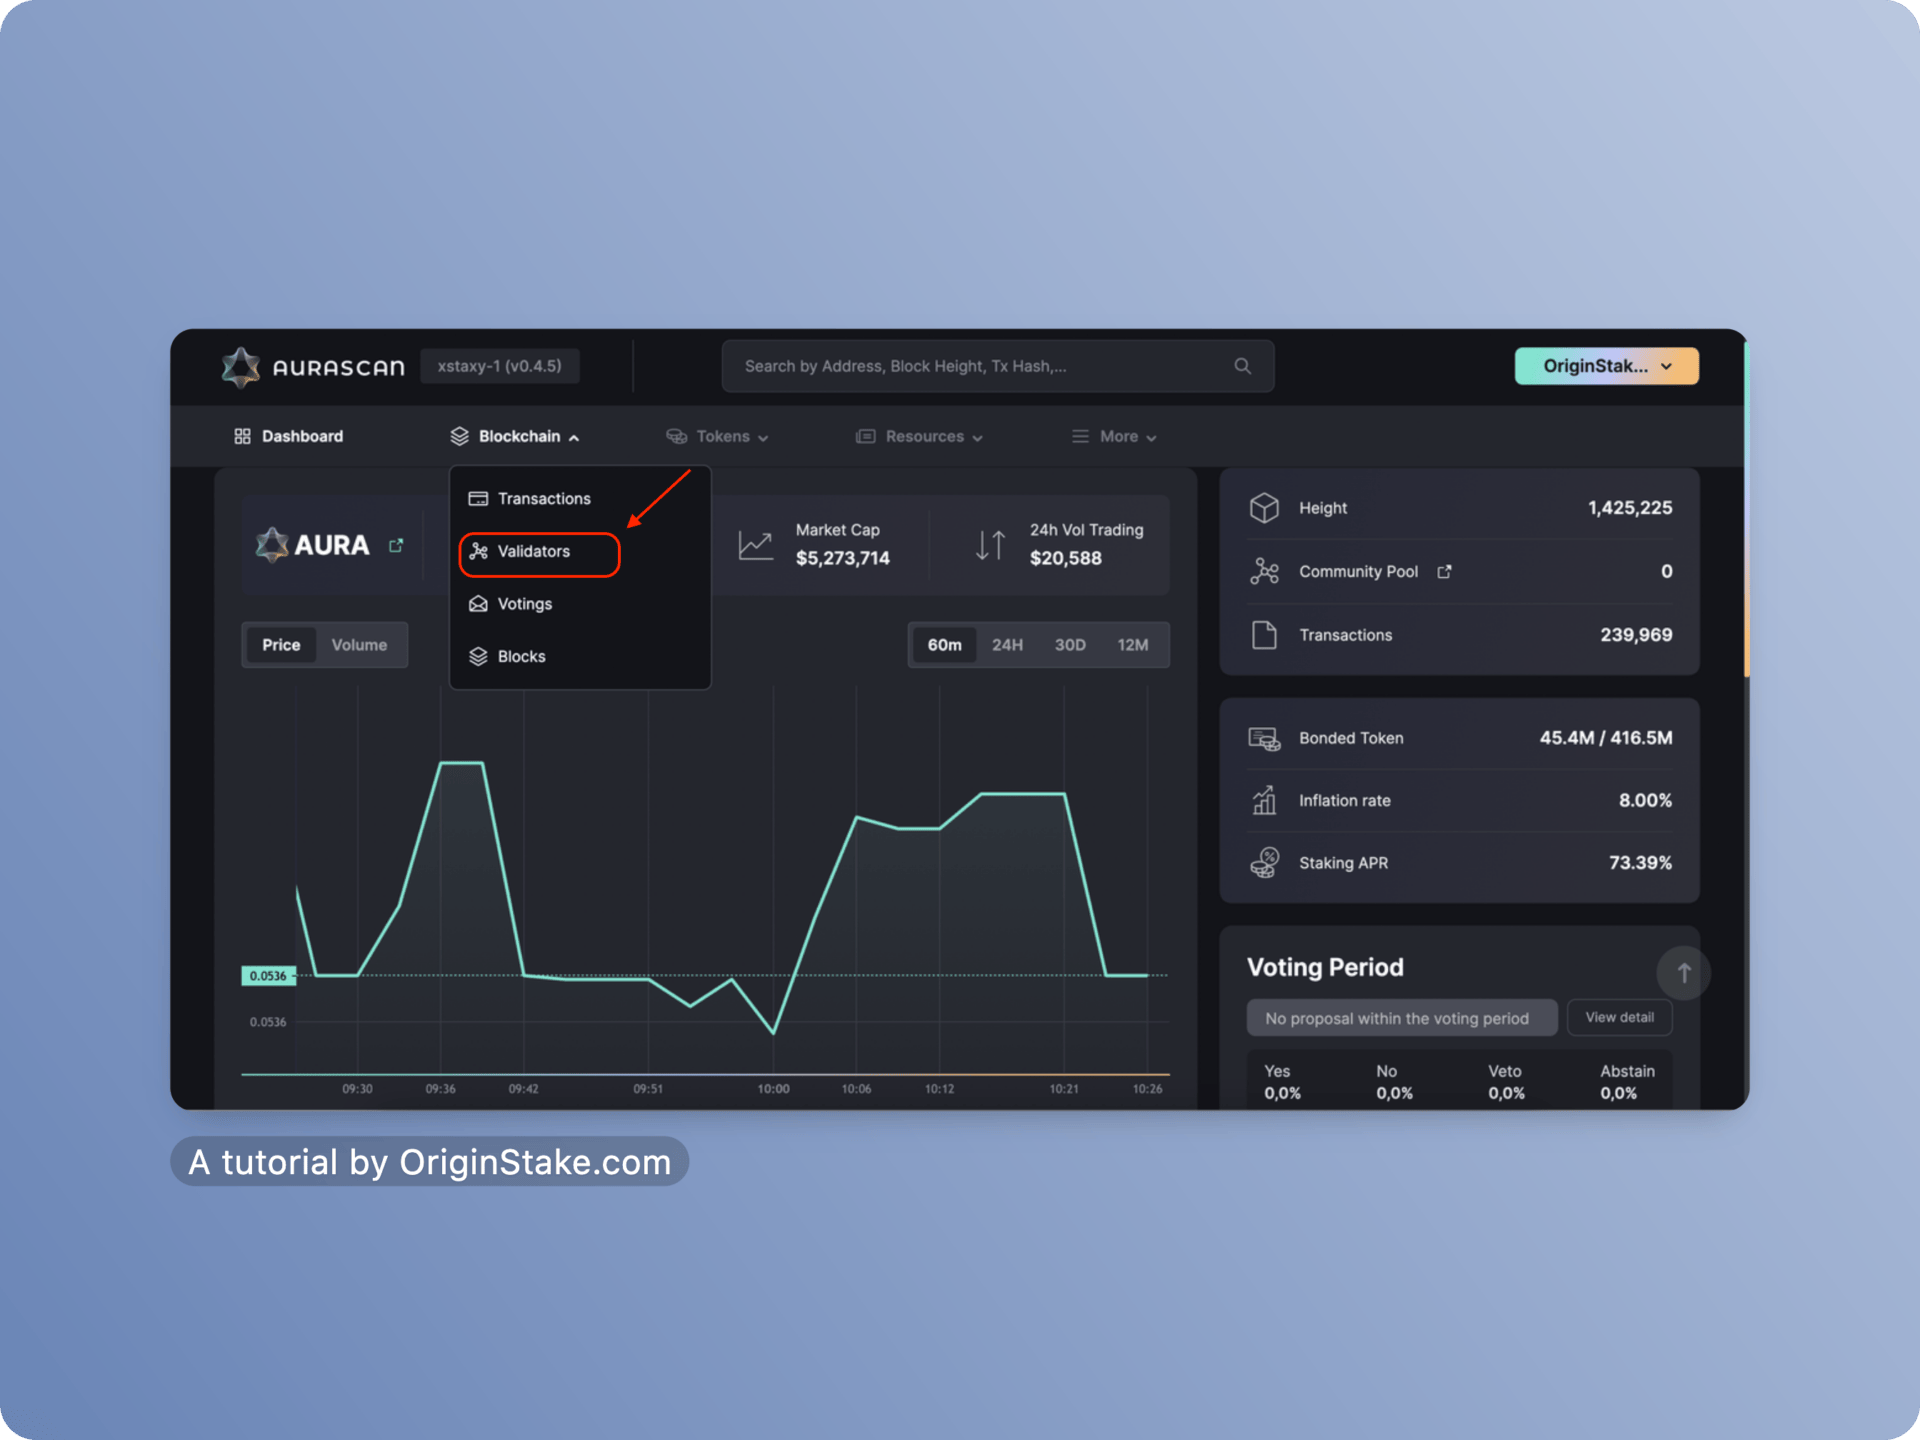
After successfully connecting your wallet, on the main interface of AuraScan, hover your mouse over the Blockchain section and select Validators.
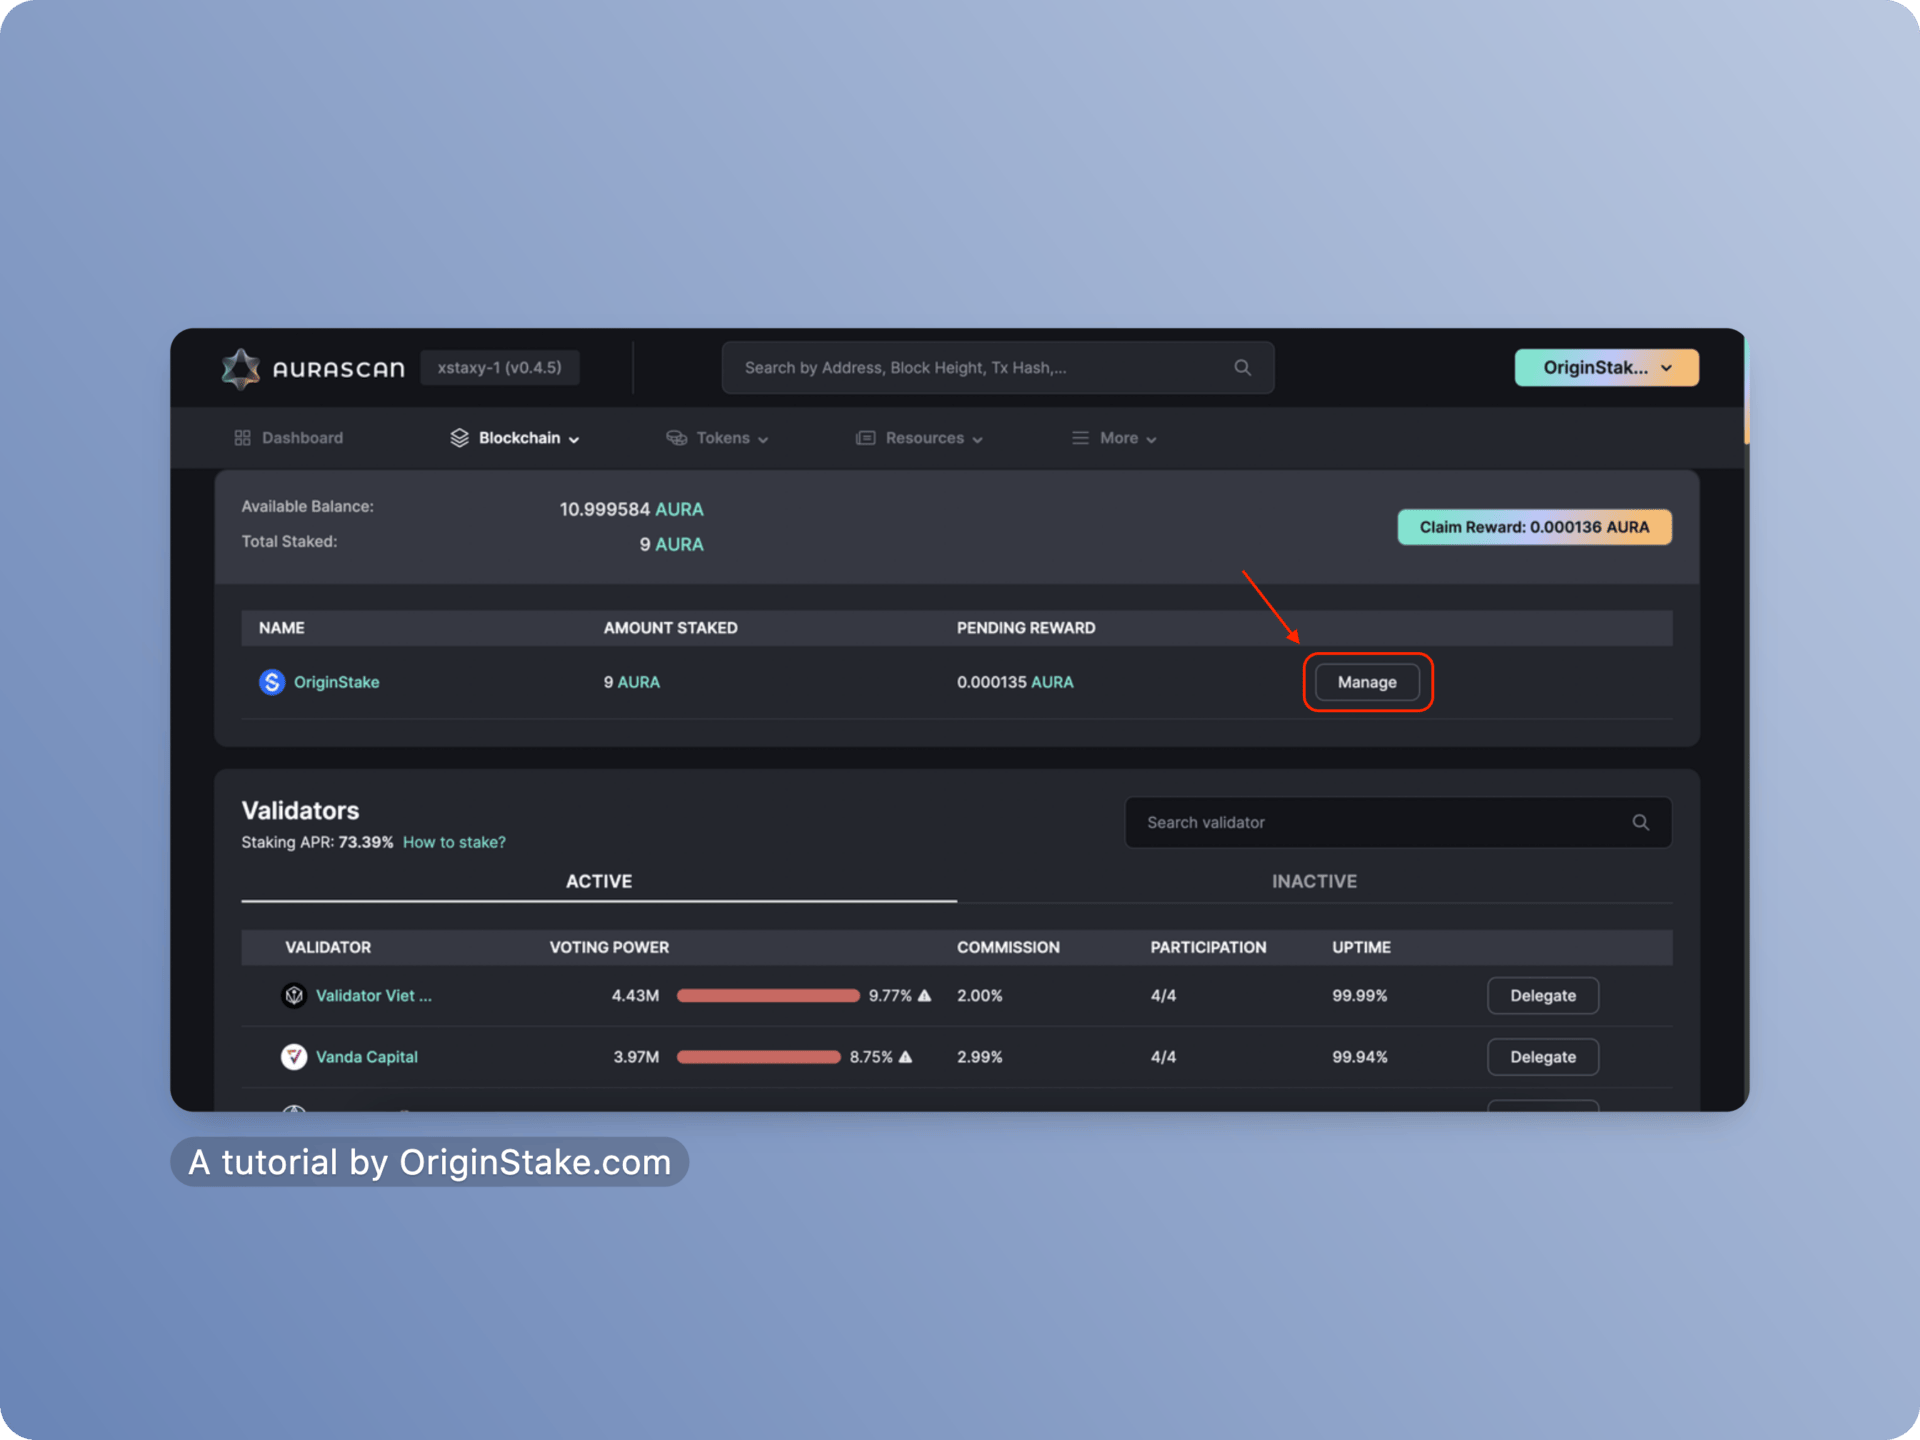
Chose “Manage“.
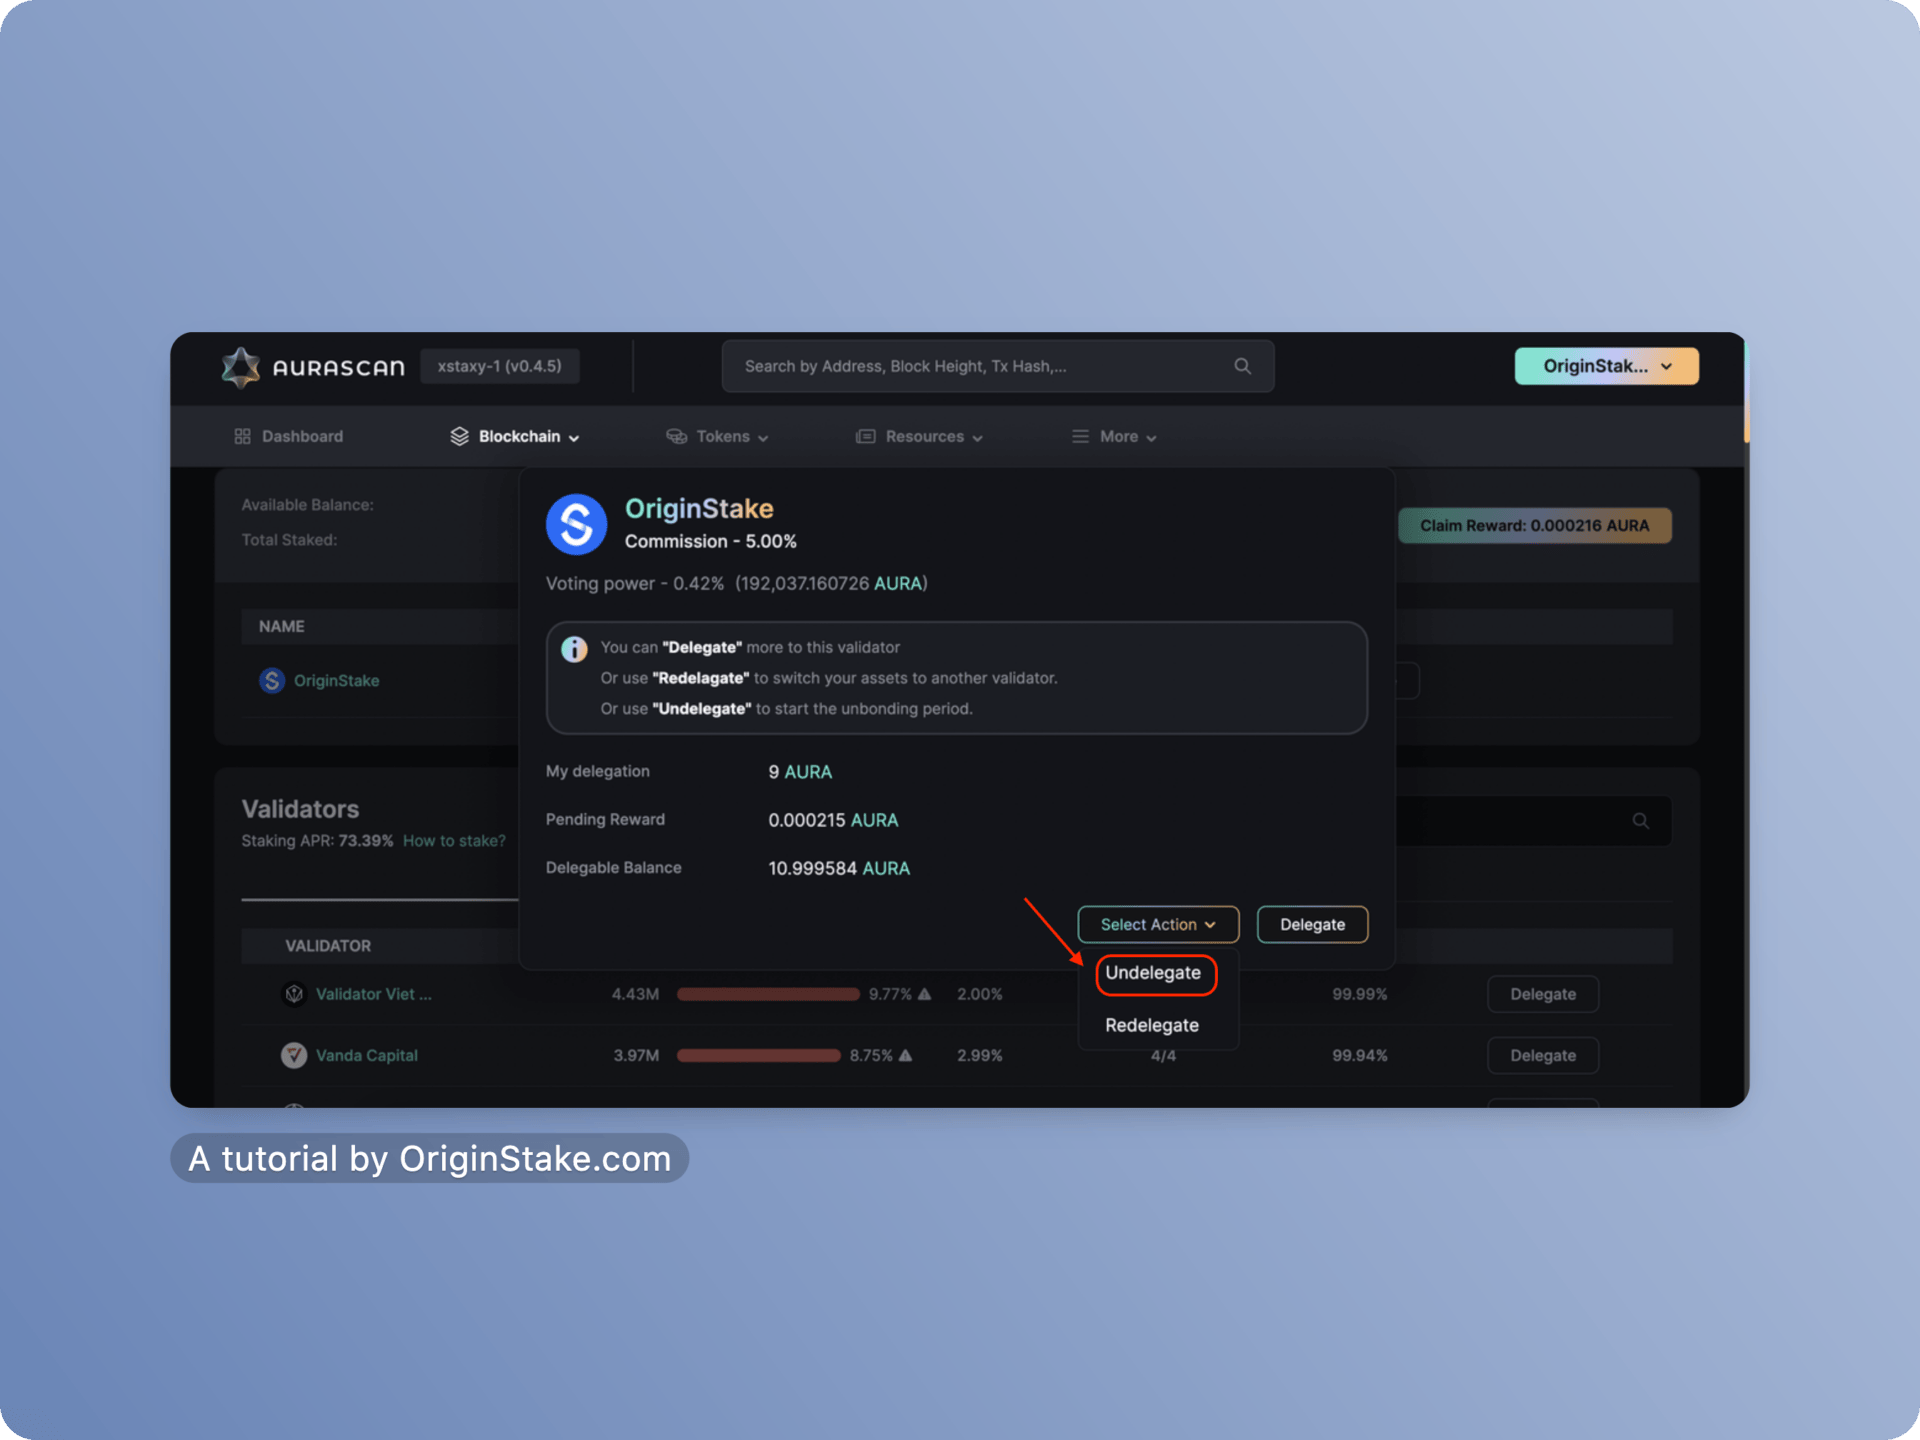
Chose “Select Action”, the function options will appear:
You can “Delegate” more to this validator
Or use “Redelagate” to switch your assets to another validator.
Or use “Undelegate” to start the unbonding period.
We chose “Undelegate” to unstake AURA.
Enter the amount of AURA you wish to Unstake, you can press ‘MAX’ to Unstake/Undelegate all.
A pop-up will appear and you need to confirm the process by clicking the ‘Approve’ button on the Keplr wallet application.
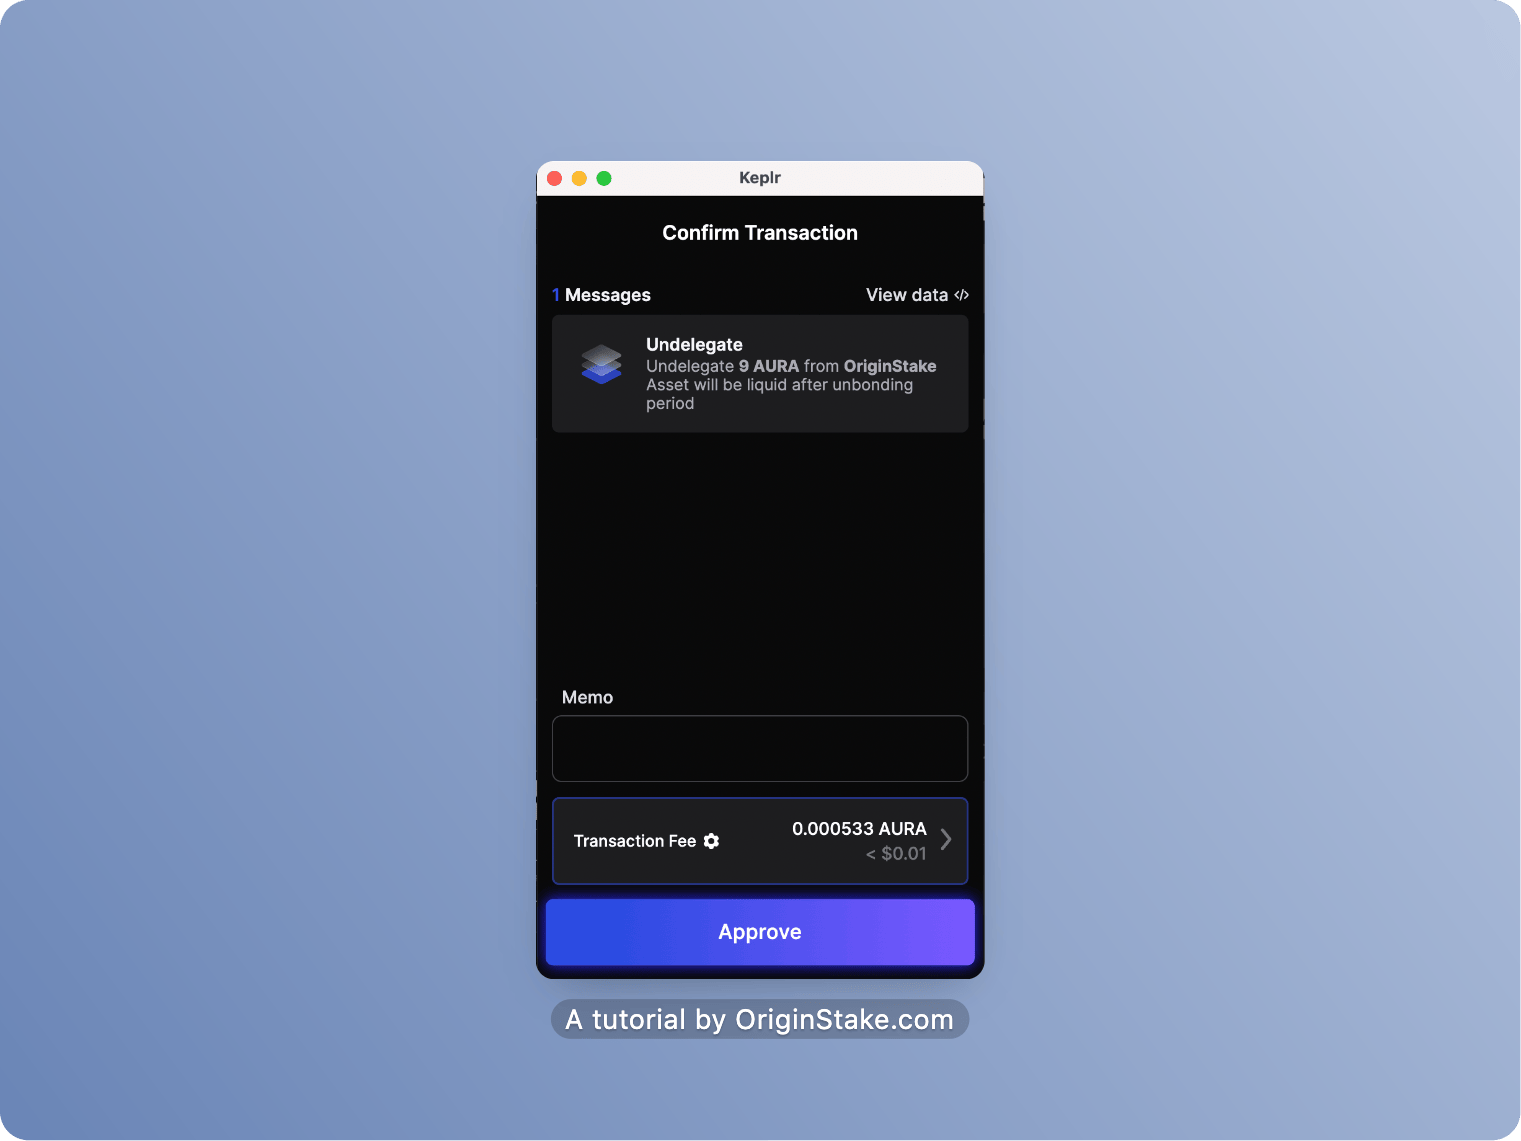
You have successfully performed the Unstake process.
Redelegate AURA by using Keplr Wallet #
(Updating….)
